It is been a while

Thursday, March 28, 2013

Pssss... I am back! with good news!! I am now own an online store, The Artsential, which sell party and craft supplies. Like finally!! After months of planning, I decided to make my plan into real deal in last September 2012. I am yet picking up the duties all over the place. Work, church and now, online business. Physically and mentality tired. Even though the timetable seem pack and always keep me content, I am grateful with everything. Hopefully I will come back to the blog world as often as I used to be.

Till then, take care and God bless!!


M

The first time

Thursday, May 10, 2012
I just got back from two weeks of Japan's trip. So I managed to post the good news. I'm so happy that I'm allowed to share the good news with you all. Finally! This is something BIG for me. Ok. Long to short. I submitted few cards to Paper Crafts couple months ago and one of the got chosen. Yes! So here's my card.

6996497846 5e6bf8dcfb Card Creations: Volume 10—The Next Generation
Photo sources: here
My card were also mentioned in Papercraft website as newbies for the issue: Volume 10. Thank you for Susan and the rest of the team for giving me a chance and this is definitely a big encouragement for me to produce more good works in future. And also Angeline Yong and Marlene too. 

I loved the simplicity of this card and also the band aid die. I picked out a little piece of gingham pattern paper from a bunch scrap paper. It is unfortunate that it only offer delivery to U.S. addresses.

If you get any chance, be sure to see what the rest of the newbies have done with this volume's release!


There are few more

Thursday, February 16, 2012

Hello there! Did you enjoy yourself with your loves one during Valentine's day? I sure hope so! I didn't quite get to post all these cards before Valentine's day as I misplaced my memory card. So I ended up borrow from my friend. Here you go...

Same as above. I created this card with the same color combination and stamp sets along with coordinating die. I cut the sentiment strip with my zip zap scissor just to add extra element onto this card. 


And how about car with full of loves? As I wanted to keep the love die cuts as the focal point of this car, I decided to stamp the car stamp straight on to the card stock and colored with light grey marker. Then adhered with small buttons at the light of the 'tutu' car.


Next up is 


"Thinking of You, Always". Simple as that. All the kisses speaks how much you love your partner. Ha! I added the love shape die cuts at the end as it will be quite empty with only the kisses alone. 


Another simple and clean card. I then realized sometimes simple is better off than adding too much of details on it. It can simple as just adhere a large love die cut at the centre and add a simple sentiment at the bottom. Simple as that. You just have to play with the layout and sketch out the ideas then work from there. 

Now, the last card for today post. With unusual yellow, grey, red color combination, I'm not sure how this color combo will turn out but the result ain't that bad. Maybe it's only me..


I also played around with the flower die that I got from Papertrey a while ago. 

Thanks so much for visiting me... I hope you've enjoyed my cards! Have a great weekend!


Xoxo, M

hello love

Saturday, February 11, 2012
In about 4 days time, it's world's XOXO's day. Or whatever. Valentine's day is approaching and unless some stroke of whirlwind romance hits me, I will be alone this year. 


This is fine with me because I do not mind to share the love with my family. With steak and red wine and/ or some chocolate fondue perhaps. Ha!


Now, with Valentine's day being just a few days away, the love bug finally decided to hit me recently. I managed to made few love love cards and honestly. I love it! Instead of sitting there and watching tv, I decided it's about time to pick up the tools and make some cards. No regrets. Very simple and clean design for this time.


Ideas were flying around the room the other night and I came out with this....


I was also super inspired after created the first card, and couldn't wait to use the same technique by die-cutting the alphabets and create another valentine's card. 


It's definitely simple and clean design for this time. Simple and clean are usually not my design style yet I need to learn to be 'simple minded' some time. 


Maybe I should post some of the details of the cards. It seem very simple and I tell ya... it is simple to make. I'm sure your partner will value it so much if you decide to make something (card, cake, cupcake etc.) for her/him. I'm not saying you must create something like this but at least some words that will cheer up his/her day. Be creative. 

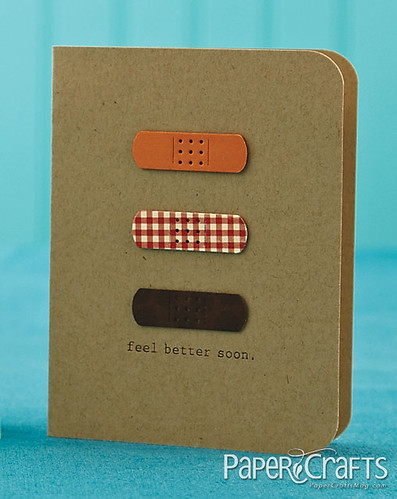
Ready for much more easier and simple card? I'm ready and I'm surprise with the outcome. Love... love it! I think it's only takes about 6 minutes to create each cards below. 


Good grief, that was fast and easy. I think I'm in love. Happy indeed!! I hope with this post, it will inspire you, you, you and you... to do/make something special for your loves one. Mom, dad, brother, sister, aunt, uncle, neighbor, nephews, nieces, friends or even your kitty kitty cat or pup! Anyone.

Thanks for stopping by and have a happy day, dear friends!


xo, M


****
Updated: WOW! How can I forget this card?! It's one of my fav among all these. Lucky that I doubt checked my photos before I dooze off for tonight. Here you go. "You + Me = Forever"


Finally got my hands in craft

Thursday, November 24, 2011
... and glue.. and cut..and punch...yeappp! Few more weeks till Christmas.

I made all these Christmas cards at a lovely friend of mine, Marlene's place on last Friday for a Christmas bazaar. We challenged each others to make at least 24 cards (at least). We had a great laugh when the clock hits 2 am in the morning and we still have few things to touch up. So basically both our challenges kinda failed... in a good way :) need to sleep.


So...you'd get this if you get challenge up at midnight...

I played around with my new PTI's stamp set. Love the simplicity and Marlene is kind enough to lend me her baker twine. 


... a "merry Christmas"


The original of this card is without the berries die... and I thought..'it looks kinda bored'. So that's the reason I decided to add on the berries and leaves die cut. 


... a "Holiday Greeting"


I didn't expect this card will look gorgeous with this patter paper. The leaves in the patter paper are glittery and just love the red, black, gold color combination.


... a "Peace be with you"


Decided to leave it as it is. Again, love the simplicity of all the cards above. Even though it took some time for me to apply the foam tape at behind of the tiny slimm-y font die, it worth doing it when I know the outcome is gonna be awesome.

Anyhow, I managed to sell two sets of these cards (3 pcs in one set) and few old cards during the Christmas bazaar on last Sunday. It was a great experience for me. I didn't earn big money but earned the experiences. Thank you to an aunt who been doing this years now. She told me, "as a crafter, never give up easily. Life is all about learning and experiencing disappointment, it doesn't mean end of the world. You just have to keep going and keep trying."-  Thank you for the reminding, auntie. I will keep that in mind. Never give up but keep trying.


November gonna end in few more days. Geez.. time flies. Few more weeks till Christmas and I need to send all the Chirstmas cards out before it is too late. 
Anyways, if you would love to drop a comment regarding my cards, please do so. Till then, stay safe and god blessed y'all. Love xoxo

Midnight work

Monday, October 17, 2011
I made these couple nights ago before go to bed. When I woke up the next morning, 'geeez...did I make these?'  One of my favorite time to make cards.Ha! Here's my take. 

This is one and only card that I made during my last visit back to Sydney in September this year. I got all the supplies when I go to a craft store. *excuses *wink :)

The first card was the one that I made during the night.


Then I realized the brown color is too strong so here's the second take which I slightly changed the color combo. It can be better. Pattern and color combo's wise. 


Next up is a 'thank you' card by using the same stamp set. I creates a little window on it and stamped the sentiment inside. And I also added a little diamond sticker at the center of the patter.


'Hello Friend' is from the same stamp set that I used for the two cards above but in different color combo and pattern design.Love the simplicity.


Last but not least, a tutu onesie card for my girlfriend who just gave birth to a baby girl.
I hand-cut the onesie shape out from a patter paper and adhered some buttons, blings and of course, the tutu!!! At first, I only adhere one layer of tutu but on the second thought, 'this is not enough for the puff'. More tutu please!!

I was inspired from the tutu dress that my dearly friend, Li-ya who made a tutu dress for her little jellybean a while ago. Love her creativity. Love the cuteness.


That's about it for today. Love y'all :)

Friday Love

Saturday, October 1, 2011
Good day, everyone!

It's already the first October! 
 
I hope you all are doing good wherever you at and having a great time with your loves one. For the past few weeks, I was busying at work and... at home as well. My brother, SIL and nephew had moved to Miri and were staying with us while waiting their apartment is undergoing renovation. So we all who included my parents (the grandparents for Laurence) were busy playing with him. All good though (:

Anyway, SIL had requested a 1 month birthday card for brother's friend's baby boy. So I decided to make one after back from supper with brother's family (: 

I cut the cardstock into an onesie shape. Cuteee (: I die cut and colored the little truck and paired it with two buttons. At first, my plan was keep it simple but decided to put the scallop edge around the sleves. I'm not sure whether it is a good decision or not but hope the recipient will like it. 

Sorry for the poor lighting :p


For the second card, I actually made the stripes background a while and left them on the table for quite some times. Before I sleep, I decided to give them a home. haha. So here's my take.


Notice the measure tap ribbon? Love it. I got it from a craft store while I last visited Sydney.


That's all for this post. Have a great weekend loves. Till then, take care and much love, 

xoxo, M